Not much to update over the last few weeks, most of my activity on the car has been around the electrics, making up all the connectors, routing and securing the wires. Most items are now complete and wired up, there's a handful of jobs to do but I'll have to wait until I have instruments & switches. I've now re-wired the steering column, pictured below, I've cut down and insulated all the unused wires, including those from the ignition switch, they're not needed but I thought I'd leave in place just in case I plan something in the future.
 |
| Re-Wired Steering Column |
Some of the electrical work has to be done from underneath the car and while it was up on the stands I double checked to make sure all the brake pipes and cables were secured at a minimum of 300 mm as per the IVA regs. I had done this when I installed it, but you start to get paranoid about these things. I'd used rubber fuel hose appropriately marked for IVA but panicked when I couldn't see the marking. When I fitted the pipe it was fitted from above as there was no body on the car. Stupidly I had put all the pipe with the marking facing upward to make it easy to see, not so easy when the body is on and you are looking from underneath. A happy couple of hours on my back in a cold garage refitting all the fuel pipe.
 |
| Centre Marked |
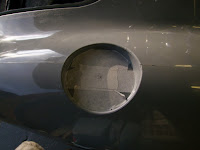
The downside of doing the electrical work is that it looks like you haven't made any progress, several hours in the garage and the car looks the same as when you started. There's more of a buzz when you fit something tangible, especially when it's shiny! I set about fitting the fuel filler cap. I bought one of the Aston style caps from Brasscraft. First locate the centre of the recess in the body and then follow the usual rule of cutting a hole too small and slowly expanding it. I used M5 countersunk slotted screws to secure the flange to the body, with large diameter washers underneath. Once the flange was fitted I found you cannot screw the cap on without releasing the catch but not allowing the flap to open fully. With the cap fitted I wanted to install the filler hose. I had bought a 500 mm length, my initial measurements suggested this would be enough, the reality of the curve required means it's not! It was under too much tension on the unions to be safe, nothing for it but to by a longer length ( at about 3x the price).
With a spare couple of hours I wanted to trail fit the dashboard. Installation is straight forward, there are screws glassed into the back of the dashboard, you need to drill holes into the lip under the scuttle. Lining up is not easy as the dashboard is relatively flat whereas the scuttle is curved. I started at the outside edges working into the centre. I've found that the dashboard seems not to be made correctly in that it is biased by about 10 mm to the nearside. If I try and centre it against the scuttle it does not centre over the transmission tunnel, centred on the tunnel it's about 10 mm over on the nearside and too short on the off side. After half an hour of pushing and pulling I decided that it must be the dash that's wrong. I have installed centred on the tunnel and will glass up the off side to add a little extension.
 |
| Masking Tape Template |
Next was to cut out the whole for the steering column. I started by making a template out of masking tape around the column. I transferred the template to the dash using the fixing screws as locating points. Marking up the dash and cutting about 5 mm inside the marking gave me a good starting point. I put the column back in using some lengths of M8 threaded bar allowing me to move the column up and down while slowly enlarging the hole but without having to keep taking the column out.
 |
| Initial Cut |
 |
| Final Location |
Latest job is to fit the windscreen. I bought the screen and surrounds from Brasscraft and am very impressed with the finish. Fitting the screen was, considering the significance of piece, much easier than I expected, certainly quicker than fitting the steering column to the dashboard. The legs of the screen pillars slot into holes cut in the body at the factory. The legs then bolt to the steel framework below the scuttle that carry the door hinges. The rake angle is achieved using a piece of wood 36 in long from the back of cockpit to the top of the screen. The screen takes a little gentle encouragement to sit on the scuttle properly, mainly because the rubber seal was cold. I used a fan heater to warm up the area and soften the seal which made the job much easier. Once I was happy it was level and centred I drilled holes (2 each side) through the pillar and into the steelwork. The holes were tapped out and fitted with M8 bolts. I also fitted the escutcheon plates at the foot of the pillars.
 |
| Screen Fitting |


No comments:
Post a Comment